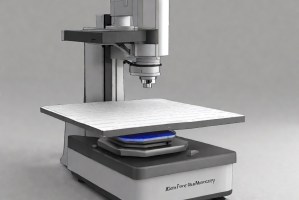
ASTM E1221 Crack Arrest Fracture Toughness (KIa) Testing for Ferritic Steels
ASTM E1221 test method is used to determine the plane-strain crack-arrest fracture toughness, KIa , of ferritic steels. Crack-arrest fracture toughness, KA , is the ability of a region in a material to halt a crack.

TRUSTED BY


Precision-driven testing for dimensional accuracy and compliance
- Overview
- Scope, Applications, and Benefits
- Test Process
- Specifications
- Instrumentation
- Results and Deliverables
Overview
ASTM E1221 defines a standardized fracture mechanics method to determine the plane-strain crack-arrest fracture toughness (KIa) of ferritic steels. The test evaluates a material’s ability to stop a rapidly propagating brittle crack under dynamic loading conditions, which is critical for preventing catastrophic structural failure.
This method is particularly important for steels used in pressure vessels, pipelines, and structural components operating at low temperatures. By measuring crack-arrest capability rather than crack initiation, ASTM E1221 provides deeper insight into fracture control strategies and enhances safety in critical engineering applications.

Scope, Applications, and Benefits
Scope
ASTM E1221 establishes procedures for measuring KIa in ferritic steels under plane-strain conditions using dynamic fracture testing. It focuses on crack propagation and arrest behavior under controlled loading and temperature environments.
- Determines crack-arrest fracture toughness (KIa) of ferritic steels
- Applicable to thick specimens ensuring plane-strain conditions
- Evaluates dynamic crack propagation and arrest behavior
- Requires controlled low-temperature testing conditions
- Uses instrumented fracture mechanics testing systems
Applications
- Fracture safety assessment of pressure vessels
- Pipeline integrity and failure prevention studies
- Structural steel performance evaluation
- Low-temperature material qualification
- Nuclear and energy sector material validation
- Research in fracture mechanics and crack propagation
Benefits
- Measures resistance to crack propagation and arrest
- Enhances safety in brittle fracture-prone applications
- Supports material selection for low-temperature service
- Provides critical fracture mechanics data
- Improves design against catastrophic failure
- Enables comparison of material toughness performance
Test Process
Specimen Preparation
Thick fracture mechanics specimens are notched and pre-cracked to ensure plane-strain conditions.
1Temperature Conditioning
Specimens are cooled to specified low temperatures to promote brittle fracture behavior.
2Dynamic Loading
Load is applied to initiate and propagate a crack under controlled conditions.
3Crack Arrest Measurement
Crack propagation is monitored, and KIa is calculated based on arrest conditions.
4Technical Specifications
| Parameter | Details |
|---|---|
| Standard | ASTM E1221 |
| Test Principle | Measurement of crack-arrest toughness under plane-strain dynamic fracture conditions |
| Applicable Materials | Ferritic steels |
| Measurement Output | Crack-arrest fracture toughness (KIa, MPa√m) |
| Specimen Type | Compact tension (CT) or similar fracture mechanics specimen |
| Crack Condition | Fatigue pre-cracked to ensure sharp crack tip |
| Temperature Range | Typically low temperatures to induce brittle behavior |
| Loading Type | Dynamic or rapidly applied load |
Instrumentation Used for Testing
- Fracture mechanics testing machine
- Low-temperature chamber or cooling system
- Crack length measurement devices
- Load cell and data acquisition system
- High-speed instrumentation (optional)
- Specimen preparation tools
- Optical or fracture surface analysis equipment
Results and Deliverables
- Fracture mechanics testing machine
- Low-temperature chamber or cooling system
- Crack length measurement devices
- Load cell and data acquisition system
- High-speed instrumentation (optional)
- Specimen preparation tools
- Optical or fracture surface analysis equipment
Why Choose Infinita Lab for ASTM E1221?
With Infinita Lab (www.infinitalab.com), you are guaranteed a Nationwide Network of Accredited Laboratories spread across the USA, the best Consultants from around the world, Convenient Sample Pick-Up and Delivery, and Fast Turnaround Time.
Our team understands the stakes and subtleties of every test. Whether you’re validating a new Product, de-risking a prototype, or navigating complex compliance requirements, our specialists guide the process with rigor and clarity.
Looking for a trusted partner to achieve your research goals? Schedule a meeting with us, send us a request, or call us at (888) 878-3090 to learn more about our services and how we can support you. Request a Quote
Frequently Asked Questions
The ASTM E1221 test determines ferritic steels' plane-strain crack-arrest fracture toughness (KIa).
KIa measures a material’s ability to arrest a propagating crack, while KIC characterizes resistance to crack initiation. KIa is more relevant for dynamic fracture control, especially in structures where crack propagation must be stopped to prevent catastrophic failure.
Crack-arrest fracture toughness is critical for understanding how materials behave when cracks form and propagate under stress.
Typically, room temperature is used for testing; however, testing can also be performed at low or high temperatures, depending on the application.
Plane-strain conditions ensure maximum constraint at the crack tip, producing conservative toughness values. Without sufficient thickness, plane-stress effects may dominate, leading to non-representative and overly optimistic fracture resistance measurements.

Request a Quote
Submit your material details and receive testing procedures, pricing, and turnaround time within 24 hours.
 Quick Turnaround and Hasslefree process

 Confidentiality Guarantee

 Free, No-obligation Consultation

 100% Customer Satisfaction


