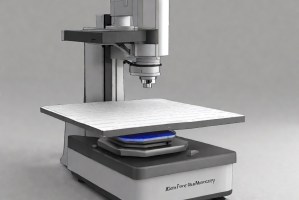
ASTM E384 Test for Microindentation Hardness of Materials
ASTM E384 test method is used to determine the microindentation hardness, hardness over a microscopic area of the test specimen. An indenter applies a small force over a small area to form a tiny indent. The indentation is measured and the Knoop or Vickers hardness number is calculated.

TRUSTED BY


Precision-driven testing for dimensional accuracy and compliance
- Overview
- Scope, Applications, and Benefits
- Test Process
- Specifications
- Instrumentation
- Results and Deliverables
ASTM E384 - Overview
ASTM E384 outlines the procedure for determining the microindentation hardness of materials using low applied loads, typically through Vickers and Knoop hardness methods. This test is widely used to evaluate thin materials, coatings, microstructures, and small components where conventional hardness tests are not suitable.
Microindentation hardness testing provides a precise measurement of hardness variations at the microscopic scale, making it essential for materials research, failure analysis, and quality control. It supports industries such as metallurgy, electronics, aerospace, and coatings by enabling accurate characterisation of localised mechanical properties.

Scope, Applications, and Benefits
Scope
Microindentation hardness testing is used to evaluate the hardness of materials at very small scales, making it ideal for detailed microstructural analysis. It provides precise insights into localised mechanical behaviour, especially in thin sections or treated surfaces.
Key evaluations include:
- Vickers hardness (HV) and Knoop hardness (HK) values
- Hardness of thin films, coatings, and individual microstructural phases
- Case depth and hardness gradients in surface-treated materials
- Mechanical property variations across small or heterogeneous regions
- Correlation of hardness with strength and wear resistance
Applications
- Metallurgical microstructure analysis and phase identification
- Thin coating and surface treatment evaluation
- Semiconductor and electronic component testing
- Weld zone and heat-affected zone (HAZ) hardness profiling
- Failure analysis and fracture investigations
Benefits
- Enables precise hardness measurement at the micro-scale
- Suitable for brittle, thin, or delicate materials
- Minimal sample damage due to low test loads
- Supports quality control and R&D applications
- Provides insight into material uniformity and treatment effectiveness
ASTM E384 - Test Process
Sample Preparation
Specimens are sectioned, mounted, ground, and polished to achieve a smooth, scratch-free surface.
1Indentation
A Vickers or Knoop diamond indenter is applied under a controlled load for a specified dwell time.
2Measurement & Calculation
Indentation diagonals are measured using a microscope, and hardness values (HV/HK) are calculated.
3Reporting
Results are documented with load, dwell time, indenter type, and test location.
4ASTM E384 - Technical Specifications
| Parameter | Details |
|---|---|
| Load Range | 1 gf to 1000 gf |
| Dwell Time | Typically 10–15 seconds |
| Indenter Type | Diamond pyramid (Vickers), elongated diamond (Knoop) |
| Measurement | Optical microscopy |
| Accuracy | ±2–5% depending on calibration and surface quality |
Instrumentation Used for Testing
- Microhardness tester with Vickers and Knoop indenters
- Optical microscope with digital measurement system
- Precision sample preparation equipment (mounting press, grinder, polisher)
- Calibration standards and reference test blocks
- Image analysis software for indentation measurement
Results and Deliverables
- Vickers hardness (HV) or Knoop hardness (HK) values
- Indentation images and measured diagonals
- Hardness profile across microstructural regions (if required)
- Case depth or coating thickness correlation (if applicable)
- Test report with load, dwell time, and method traceability
Partnering with Infinita Lab for Optimal Results
Infinita Lab addresses the most frustrating pain points in the ASTM E384 testing process: complexity, coordination, and confidentiality. Our platform is built for secure, simplified support, allowing engineering and R&D teams to focus on what matters most: innovation. From kickoff to final report, we orchestrate every detail—fast, seamlessly, and behind the scenes.
Looking for a trusted partner to achieve your research goals? Schedule a meeting with us, send us a request, or call us at (888) 878-3090 to learn more about our services and how we can support you. Request a Quote
Frequently Asked Questions
The Vickers test method uses a square-pyramidal indenter that gives a more symmetrical indentation, whereas the Knoop test method uses an elongated rhombic indenter. The Knoop test method is preferred for tests on anisotropic materials or when testing brittle surfaces.
It sees wide applications in the testing of coatings, thin films, microstructures in metals and ceramics, and minor components, which are difficult to test by methods at the macro level.
The forces usually range from 1 gf to 1000 gf, depending on the material and the depth to which indentation is to be made.
The concept of mechanical properties, such as material wear resistance, ductility, and strength, can be estimated by measuring microhardness. ASTM E384 test is helpful for the determination of surface treatments and coatings.
This test method, in principle, can be applied to most materials, such as different types of ceramics, polymers, composites, and metallic materials.

Request a Quote
Submit your material details and receive testing procedures, pricing, and turnaround time within 24 hours.
 Quick Turnaround and Hasslefree process

 Confidentiality Guarantee

 Free, No-obligation Consultation

 100% Customer Satisfaction


