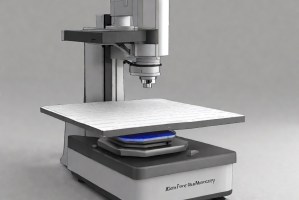
ASTM C1651 Roll Wave Distortion measurement in Heat-Treated Flat Glass
The standard method ASTM C1651 measures roll wave optical distortion in Architectural Glass. The peak-to-valley depth and peak-to-peak distances can be used to determine roll wave distortion in flat, heat-treated architectural glass. Values in inch-pound units are used as standard.

TRUSTED BY


Precision-driven testing for dimensional accuracy and compliance
- Overview
- Scope, Applications, and Benefits
- Test Process
- Specifications
- Instrumentation
- Results and Deliverables
Overview
ASTM C1651 provides a standardized method for measuring roll wave distortion in heat-treated flat glass. Roll wave distortion refers to periodic surface waviness caused during the tempering or heat-strengthening process, which can affect optical clarity and visual quality.
This test is essential for evaluating the surface profile and ensuring that distortion levels remain within acceptable limits. ASTM C1651 helps manufacturers maintain high-quality glass products by enabling accurate measurement and control of surface irregularities introduced during thermal processing.

Scope, Applications, and Benefits
Scope
ASTM C1651 specifies procedures for quantifying roll wave distortion in heat-treated flat glass using precise measurement techniques to evaluate surface irregularities.
- Applicable to tempered and heat-strengthened flat glass
- Measures periodic surface waviness (roll wave)
- Evaluates optical distortion and surface quality
- Includes standardized measurement intervals and locations
- Ensures repeatable and accurate surface assessment
- Supports quality control and product acceptance
Applications
- Architectural and façade glass
- Automotive glazing
- Solar panel glass
- Display and optical glass products
- Quality control in glass manufacturing
- Inspection of heat-treated glass surfaces
Benefits
- Ensures high optical quality of glass
- Detects surface distortion caused during processing
- Supports compliance with visual quality standards
- Improves manufacturing process control
- Enhances customer satisfaction and product performance
- Provides standardized and reliable measurements
Test Process
Specimen Placement
Position the glass specimen on a stable and level measurement platform.
1Measurement Setup
Align measuring instruments along the glass surface in the rolling direction.
2Profile Measurement
Record surface height variations across specified intervals.
3Data Evaluation
Analyze measurements to quantify roll wave amplitude and spacing.
4Technical Specifications
| Parameter | Details |
|---|---|
| Material Type | Heat-treated flat glass |
| Distortion Type | Roll wave (periodic waviness) |
| Measurement Direction | Along glass rolling direction |
| Measurement Parameter | Wave amplitude and spacing |
| Specimen Condition | Clean and defect-free surface |
| Test Environment | Controlled ambient conditions |
| Output Result | Quantified roll wave distortion values |
Instrumentation Used for Testing
- Surface profilometer
- Optical distortion measurement system
- Straight edge or reference beam
- Dial gauge or displacement sensors
- Data acquisition system
- Glass support platform
Results and Deliverables
- Roll wave amplitude values
- Wave spacing measurements
- Surface distortion profile data
- Optical quality assessment
- Compliance with specification limits
- Detailed inspection report with observations
Why Choose Infinita Lab for ASTM C1651?
Infinita Lab is a leading provider of ASTM C1651 and streamlined material testing services, addressing the critical challenges faced by emerging businesses and established enterprises. With access to a vast network of over 2,000+ accredited partner labs across the United States, Infinita Lab ensures rapid, accurate, and cost-effective testing solutions. The company’s unique value proposition includes comprehensive project management, confidentiality assurance, and seamless communication through a Single Point of Contact (SPOC) model. By eliminating inefficiencies in traditional material testing workflows, Infinita Lab accelerates research and development (R&D) processes.
Looking for a trusted partner to achieve your research goals? Schedule a meeting with us, send us a request, or call us at (888) 878-3090 to learn more about our services and how we can support you. Request a Quote
Frequently Asked Questions
ASTM C1651 is used to measure roll wave distortion in heat-treated flat glass by evaluating surface waviness. It helps ensure optical quality and detect distortions introduced during tempering or heat-strengthening processes, supporting quality control and product acceptance requirements.
Roll wave distortion is a periodic surface waviness formed during heat treatment due to roller contact. It affects the flatness and optical clarity of glass, making it important to measure and control for high-quality applications.
Measuring roll wave distortion is important because it directly impacts visual appearance and optical performance. Excessive distortion can cause visual defects, making the glass unsuitable for applications requiring clarity and precision.
Roll wave mainly affects optical performance and visual appearance, though excessive distortion can also influence structural behavior in some applications.
It enables manufacturers to monitor and control distortion, improve production processes, and deliver high-quality glass products that meet customer expectations and industry standards.
Case Studies
In-depth examination of genuine material testing solutions
Dopant and Ultra-Low Concentration Elemental Analysis Using STEM…
Introduction to STEM-EELS for Elemental Analysis Scanning Transmission Electron Microscopy (STEM) combined with Electron Energy Loss...
Read Case StudyAnalysis of PVC Pipe Degradation Using FTIR Spectroscopy
PVC Pipe in Infrastructure — and Why Degradation Matters Polyvinyl chloride (PVC) pressure pipe is one...
Read Case StudyNano-scale roughness measurement of Si-wafers by Atomic Force…
Nano-scale surface roughness is a critical parameter in fabricated thin-films that are used in optics, solar...
Read Case Study
Request a Quote
Submit your material details and receive testing procedures, pricing, and turnaround time within 24 hours.
 Quick Turnaround and Hasslefree process

 Confidentiality Guarantee

 Free, No-obligation Consultation

 100% Customer Satisfaction


