ASTM C849 Test for Knoop Indentation Hardness of Ceramic Whitewares
ASTM C849 is used to determine the Knoop indentation hardness of ceramic whitewares, and it is used to verify Knoop indentation hardness testing machines using standard glasses.

TRUSTED BY


Precision-driven testing for dimensional accuracy and compliance
- Overview
- Scope, Applications, and Benefits
- Test Process
- Specifications
- Instrumentation
- Results and Deliverables
Overview
ASTM C849 is a standard test method for determining the Knoop indentation hardness of ceramic whiteware materials. The test involves applying a calibrated load through a diamond Knoop indenter onto the polished surface of a ceramic specimen and measuring the resulting indentation to calculate hardness value.
This method is widely used for ceramic whitewares such as porcelain, alumina, and steatite, where conventional hardness methods are unsuitable due to material brittleness. Knoop hardness provides a reliable measure of surface resistance to permanent deformation, supporting material selection, quality control, and comparative evaluation of ceramic compositions and firing conditions.

Scope, Applications, and Benefits
Scope
ASTM C849 is a test method for evaluating Knoop indentation hardness of ceramic whitewares by measuring the indentation length produced when a specified load is applied with a diamond indenter.
ASTM C849 evaluates:
- Knoop indentation hardness of ceramic whitewares
- Surface resistance to localized deformation
- Hardness consistency across ceramic products
- Performance under microhardness loading
- Surface property comparison between materials
Applications
- Surface hardness characterization of fired ceramic whiteware components
- Quality control of ceramic bodies during and after production
- Comparative hardness evaluation of different ceramic compositions or firing temperatures
- Material selection for wear-resistant ceramic applications
- Research and development of new ceramic formulations
- Hardness mapping across ceramic cross-sections to assess firing uniformity
- Evaluation of glaze hardness versus body hardness in whiteware products
- Input data for tribological and wear performance assessments
Benefits
- Suitable for brittle materials where conventional hardness methods cause fracture
- Small indentation size minimizes surface damage to the specimen
- High measurement sensitivity for fine-grained and dense ceramics
- Allows hardness testing close to edges, interfaces, and thin sections
- Non-destructive to the bulk specimen — only surface is locally indented
- Provides statistically reliable results when multiple indentations are averaged
- Simple, well-established method with wide laboratory availability
- Compatible with microstructural analysis on the same polished surface
Test Process
Sample Preparation
Ceramic whiteware specimens are prepared with a smooth, clean surface.
1Load Application
A Knoop diamond indenter applies a specified micro-load to the specimen surface.
2Indentation Formation
The applied load produces a permanent elongated indentation.
3Data Measurement
The indentation diagonal length is measured to calculate Knoop hardness.
4Technical Specifications
| Parameter | Details |
|---|---|
| Applicable Materials | Ceramic whitewares |
| Indenter Type | Knoop rhombic-based diamond |
| Specimen Surface | Flat, polished surface required |
| Hardness Scale | Knoop Hardness Number (KHN) |
| Indentation Geometry | Elongated impression |
| Applied Load Range | Typically 100 gf – 1000 gf |
| Dwell Time | 10–15 seconds under load |
| Test Temperature | Ambient (room temperature) |
Instrumentation Used for Testing
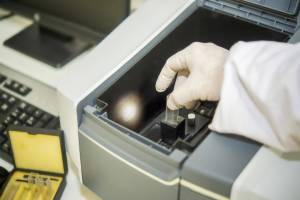
- Knoop microhardness testing machine
- Diamond Knoop indenter
- Optical microscope
- Precision load application system
- Sample holding fixtures
- Calibration and verification equipment
Results and Deliverables
- Knoop Hardness Number (KHN) for each indentation
- Average KHN with standard deviation across multiple indentations
- Applied load and dwell time used during testing
- Optical micrograph of representative indentations
- Specimen surface preparation details
- Test report compliant with ASTM C849 reporting requirements
Why Choose Infinita Lab for ASTM C849?
Infinita Lab is a trusted USA-based testing laboratory offering ASTM C849 testing services across an extensive network of accredited facilities across the USA.Infinita Lab is built to serve the full spectrum of modern testing needs—across industries, materials, and methodologies. Our advanced equipment and expert professionals deliver highly accurate and prompt test results, helping businesses achieve quality compliance and product reliability.
Looking for a trusted partner to achieve your research goals? Schedule a meeting with us, send us a request, or call us at (888) 878-3090 to learn more about our services and how we can support you. Request a Quote
Frequently Asked Questions
ASTM C849 determines the Knoop indentation hardness of ceramic whitewares through the application of a diamond indenter to measure the resistance to localized surface deformation and to provide comparative hardness values for glazed and unglazed ceramic products.
The Knoop hardness tests determine the durability of the surface of ceramic whitewares. It helps manufacturers determine scratch resistance, glaze quality, and the use of ceramics for household, sanitary, and architectural purposes.
In ASTM C849, hardness is determined by dividing the applied load by the projected area of the Knoop indentation. Accurate measurement of the long diagonal length is essential for obtaining repeatable and reliable hardness values.
It is frequently employed for ceramic tiles, sanitary wares, tableware, and decorative ceramics, as the surface hardness of these materials has a significant influence on their service life, appearance retention, and durability in buildings across the world.
ASTM C849 test standard measures surface hardness only and does not test fracture toughness or strength. The surface finish, glazing defects, residual stresses, and indentation size effects are factors that can affect the test results in ceramic material testing.
Case Studies
In-depth examination of genuine material testing solutions
Dopant and Ultra-Low Concentration Elemental Analysis Using STEM…
Introduction to STEM-EELS for Elemental Analysis Scanning Transmission Electron Microscopy (STEM) combined with Electron Energy Loss...
Read Case StudyAnalysis of PVC Pipe Degradation Using FTIR Spectroscopy
PVC Pipe in Infrastructure — and Why Degradation Matters Polyvinyl chloride (PVC) pressure pipe is one...
Read Case StudyNano-scale roughness measurement of Si-wafers by Atomic Force…
Nano-scale surface roughness is a critical parameter in fabricated thin-films that are used in optics, solar...
Read Case Study
Request a Quote
Submit your material details and receive testing procedures, pricing, and turnaround time within 24 hours.
 Quick Turnaround and Hasslefree process

 Confidentiality Guarantee

 Free, No-obligation Consultation

 100% Customer Satisfaction


