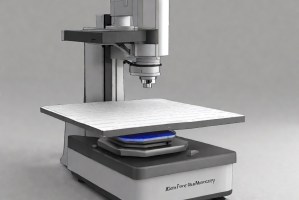
ASTM D4226 / D5420 Gardner Impact Testing for Coatings & Films
Falling Dart Impact Test (Gardner Impact) by ASTM D4226 and ASTM D5420 testing impact resistance of flat, rigid plastic materials. The impact test is needed for products that are damaged by some extent of impact force and several types of organic coatings.

TRUSTED BY


Precision-driven testing for dimensional accuracy and compliance
- Overview
- Scope, Applications, and Benefits
- Test Process
- Specifications
- Instrumentation
- Results and Deliverables
Overview
ASTM D4226 and ASTM D5420 define standardized falling-weight impact test methods for evaluating the resistance of rigid plastic sheets and laminates to fracture from a single concentrated impact. The Gardner impact test is one of the most widely used impact-resistance tests for flat plastic panel products, providing a practical pass/fail measure of toughness under conditions representative of dropped-object or localized-impact scenarios.
Both standards use a falling dart or striker of defined geometry dropped from a measured height onto a clamped flat plastic specimen. ASTM D4226 covers rigid plastic sheets directly, while ASTM D5420 is a more general instrumented or non-instrumented impact method applicable to both plastics and laminated systems. The stup method (mean failure energy) is used to statistically determine the 50% probability-of-failure energy from a series of specimens tested at incrementally varied drop heights.

Scope, Applications, and Benefits
Scope
ASTM D4226 / D5420 evaluates:
- Impact resistance (failure energy) of rigid plastic sheets
- Mean failure energy (F₅₀) using the stup statistical method
- Effect of thickness on impact resistance
- Low-temperature impact behavior of plastic panels
- Comparative impact ranking of plastic sheet products
- Pass/fail evaluation at the specified impact energy
Applications
- Acrylic, polycarbonate, and PVC sheet quality control
- Laminated safety glazing impact performance
- Printed circuit board (PCB) laminate impact resistance
- Automotive glazing and lighting panel qualification
- Architectural plastic sheet specification
- Protective panel and barrier material qualification
- Consumer product plastic panel evaluation
Benefits
- Provides practical impact resistance data for flat plastic panels
- Uses a statistical approach for precise failure energy determination
- Simple and rapid test for production quality control
- Detects product brittleness and processing defects
- Supports material selection for impact-critical applications
- Enables compliance with panel product specifications
Test Process
Specimen Preparation
Flat plastic sheet specimens are cut to the standard size and thickness is measured.
1Temperature Conditioning
Specimens are optionally conditioned at low or elevated temperature.
2Impact Testing
Dart is dropped from incrementally varying heights onto clamped specimens; pass/fail is recorded for each drop.
3Statistical Analysis
Stup method is used to calculate the mean failure energy (F₅₀) from the series of pass/fail results.
4Technical Specifications
| Parameter | Details |
|---|---|
| Test Principle | Falling dart impact on clamped flat specimen (stup method) |
| Dart Geometry | Specified hemispherical or flat-tipped striker |
| Applicable Materials | Rigid plastic sheets and laminates |
| Output Units | J (mean failure energy, F₅₀) |
| Measured Outputs | Mean impact failure energy (F₅₀), pass/fail at specified energy |
Instrumentation Used for Testing
- Gardner falling-weight impact tester
- Calibrated drop weights and guide tube
- Clamping fixture for flat specimens
- Micrometer for specimen thickness
- Temperature conditioning chamber
- Statistical analysis software for the STUP method
Results and Deliverables
- Mean failure energy (F₅₀) values
- Pass/fail record for each specimen
- Statistical analysis output (stup method)
- Specimen thickness data
- Temperature-dependent impact results (if applicable)
- Compliance documentation and quality assurance reports
Frequently Asked Questions
ASTM D4226 and D5420 evaluate impact resistance of plastic films using the Gardner impact method. They measure energy required to cause failure, helping assess durability and toughness under sudden impact conditions.
Key parameters include drop height, weight, specimen thickness, and support conditions. Controlled impact conditions ensure accurate measurement of resistance to sudden force applied on plastic films.
The test measures impact energy required to cause failure, typically expressed in joules. Results indicate toughness and resistance of plastic films to impact damage.
ASTM D4226 and D5420 apply to plastic films such as polyethylene, polypropylene, and multilayer films used in packaging and industrial applications requiring impact resistance.
ASTM D4226 and D5420 results depend on test setup and sample condition. They may not fully represent real-world impact scenarios, requiring additional testing for comprehensive material performance evaluation.
Why Choose Infinita Lab
for Electron Energy Loss
Spectroscopy (EELS)?
At the core of this breadth is our network of 2,000+ accredited labs in the USA, offering access to over 10,000 test types. From advanced metrology (SEM, TEM, RBS, XPS) to mechanical, dielectric, environmental, and standardized ASTM/ISO testing, we give clients unmatched flexibility, specialization, and scale. You are not limited by geography, facility, or methodology – Infinita connects you to the right testing, every time.
Looking for a trusted partner for Electron Energy Loss Spectroscopy (EELS) Testing?
Send query us at hello@infinitlab.com or call us at (888) 878-3090 to learn more about our services and how we can support you.

Request a Quote
Submit your material details and receive testing procedures, pricing, and turnaround time within 24 hours.
 Quick Turnaround and Hasslefree process

 Confidentiality Guarantee

 Free, No-obligation Consultation

 100% Customer Satisfaction


